When working on a new python project, I usually follow the following steps:
- Go the ‘apps’ folder on my desktop
- Create a new folder for this specific project, let’s call it ‘test_project’
- Open VS Code and open this ‘test_project’ folder there
- Open my terminal on VS Code using shortcut Ctrl+Shift+`
- Install a virtual environment called venv. I do this using the command python3 venv venv
- I activate the virtual environment using command source venv/bin/activate – then I pip install all the necessary packages.
- I initiate git using git init command
- I create a new file called app.py inside the project folder. This is where I start writing my code.
I create a lot of projects all the time and the above steps take up a lot of my time – time that I can spend doing stuff I love.. like write code. You probably have a similar workflow when starting a new project – let’s automate this process. Imagine typing a single command in your terminal, like
create_new_project test_projectand your computer does all of the above steps for you. This is what we are trying to achieve. We need to create some shell commands in order to achieve this – let me show you how.
Open your terminal and create a new file called cnp.sh (short for ‘create new project’). We do this by typing the following command in the terminal.
touch cnp.shIn order to be able to open VS Code from your terminal, you need to have the code command available in your terminal. How to check if you have this command enabled on your terminal? Just type the following command
code --versionIf you see the version information, it means that the command is available.
Here’s my terminal when I type the above command:

If you do not have this code command enabled, here’s what you do:
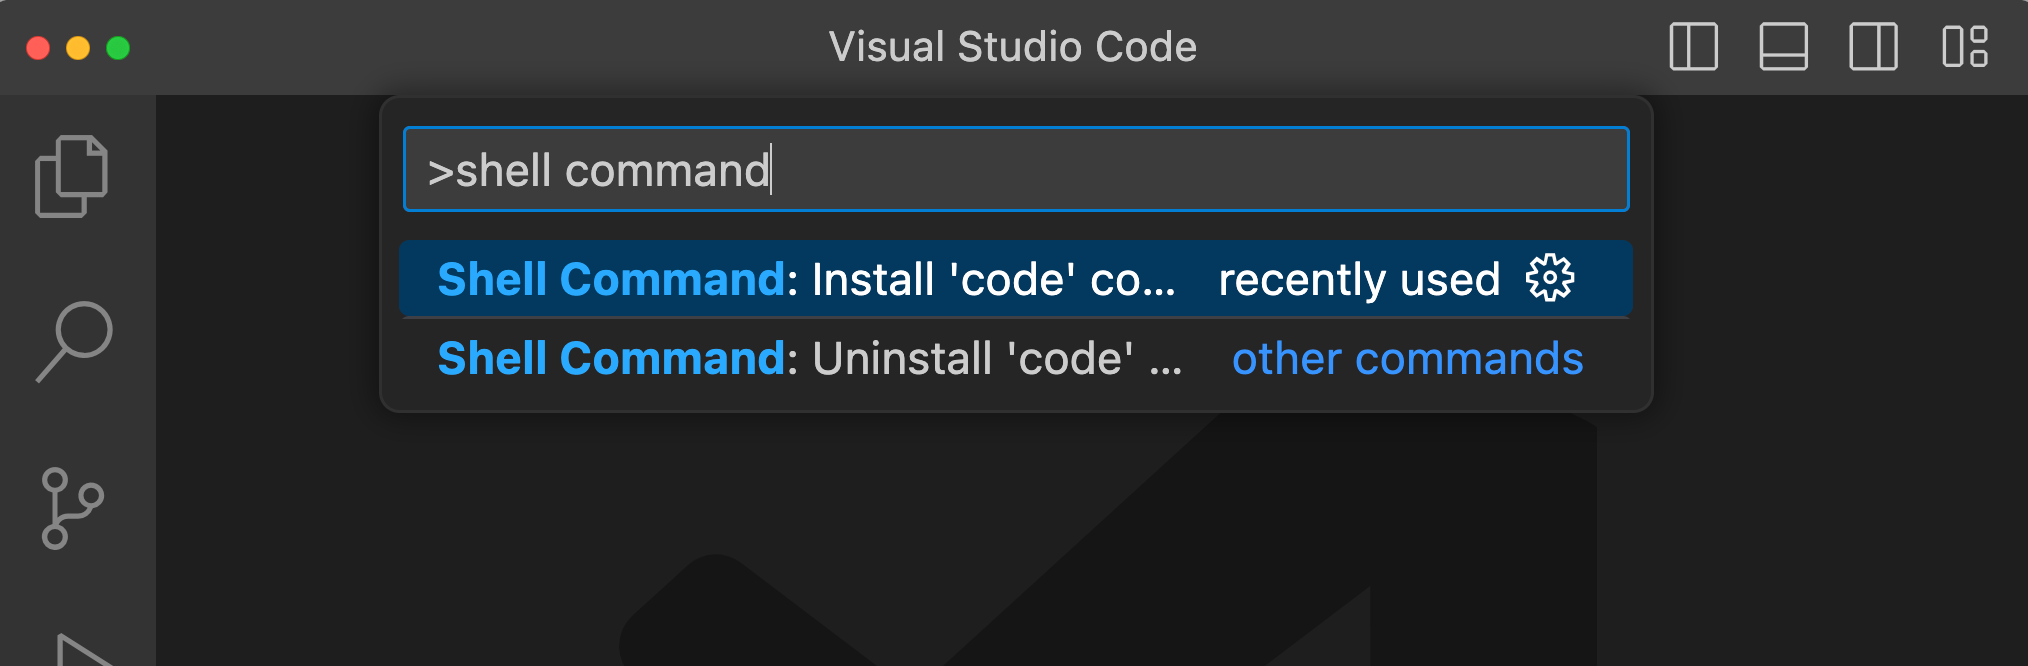
- Open VS Code and open the command palette using ‘Cmd+Shift+P’
- Type ‘Shell Command’ in the search bar and select “Install ‘code’ command in PATH”
The code command should work once you restart your terminal.
Once you have the code command enabled, open this cnp.sh file in nano text editor by using the following command
nano cnp.shThe following code goes into cnp.sh
#!/bin/bash

#PART A:
# Check if a project name is provided
if [ -z "$1" ]; then
  echo "Usage: ./cnp.sh <project_name>"
  exit 1
fi

# Create a new directory for the project inside the 'Apps' folder
project_name=$1
parent_dir="YOUR FOLDER PATH HERE"

# Check if 'apps' directory exists, if not, create it
if [ ! -d "$parent_dir" ]; then
  mkdir "$parent_dir"
fi

# Create the project directory inside the 'Apps' folder and navigate into it
mkdir "$parent_dir/$project_name"
cd "$parent_dir/$project_name"

#PART B:
# Create and activate a virtual environment and git here
python3 -m venv venv
source venv/bin/activate
touch app.py
git init

# Optionally, you can also install some common packages too

echo "Project $project_name created inside $parent_dir and virtual environment activated!"

#PART C:
# Create a .vscode directory and settings.json file for the workspace
mkdir .vscode
echo '{
  "terminal.integrated.profiles.osx": {
    "bashWithVenv": {
      "path": "/bin/bash",
      "args": ["--init-file", "./venv/bin/activate"]
    }
  },
  "terminal.integrated.defaultProfile.osx": "bashWithVenv",
  "auto-run-command.rules": [
    {
      "condition": "always",
      "command": "workbench.action.terminal.toggleTerminal"
    }
  ]
}' > .vscode/settings.json


# Open the project folder in Visual Studio Code with the new settings and open the terminal
code .
I will explain what we are doing in the above code part by part.
In Part A, we tell the computer that we will be using the command cnp.sh along with the desired name of the folder that we plan to create. We ask the computer to check if the particular folder already exists before proceeding with the next steps. We then ask the computer to create a folder with this specific name.
In Part B, we ask the computer to
- Create and activate a python virtual environment called venv
- Create a file called app.py
- Initiate git
- Print a success message for us in the terminal
In Part C, we create a hidden folder called .vscode with instructions for VS Code to open the application with this particular project folder and then open the terminal for us there after enabling the virtual environment.
After saving the above code in cnp.sh, we have to give special privileges to this script. We do this by running the following command in the terminal
chmod +x cnp.shWe also have to enable ‘Auto Run Command’ extension on VS Code. You do this by going to the command palette there, searching for ‘Auto Run Command’ and enabling it.
Let me use this ./cnp.sh new_project command on my computer and see how it goes.
Works perfectly 👍
In addition to enabling virtual environment, you can also have the computer install python packages by adding additional commands under
source venv/bin/activateAlso, if you work on different types of projects and would want different packages installed in the project folder everytime, you can add another variable near the shell command cnp.sh in the following format
./cnp.sh <project_name> <package_name>This way, for test_project1, you can install numpy and for test_project2, you can install NLTK. To make this possible, you have alter the above script to make it accept 2 variables from the command instead of 1.
project_name=$1
package_name=$2
and then include the following line in Part B under source venv/bin/activate
pip install $package_nameIf you use a Windows machine, you need to make several changes to the above script. Save the script below as cnp.bat
@echo off

REM PART A:
REM Check if a project name is provided
if "%~1"=="" (
  echo Usage: cnp.bat ^<project_name^>
  exit /b 1
)

REM Create a new directory for the project inside the 'Apps' folder
set "project_name=%~1"
set "parent_dir=YOUR FOLDER PATH HERE"

REM Check if 'Apps' directory exists, if not, create it
if not exist "%parent_dir%" (
  mkdir "%parent_dir%"
)

REM Create the project directory inside the 'Apps' folder and navigate into it
mkdir "%parent_dir%/%project_name%"
cd /d "%parent_dir%/%project_name%"

REM PART B:
REM Create and activate a virtual environment and git here
python -m venv venv
call venv\Scripts\activate.bat
type nul > app.py
git init

REM Optionally, you can also install some common packages too

echo Project %project_name% created inside %parent_dir% and virtual environment activated!

REM PART C:
REM Create a .vscode directory and settings.json file for the workspace
mkdir .vscode
echo {
  "terminal.integrated.profiles.windows": {
    "cmdWithVenv": {
      "path": "cmd.exe",
      "args": ["/K", "venv\\Scripts\\activate.bat"]
    }
  },
  "terminal.integrated.defaultProfile.windows": "cmdWithVenv",
  "auto-run-command.rules": [
    {
      "condition": "always",
      "command": "workbench.action.terminal.toggleTerminal"
    }
  ]
} > .vscode/settings.json

REM Open the project folder in Visual Studio Code with the new settings and open the terminal
code .
You should be able to replicate the same outcome as above by running the following command in your PowerShell
cnp.bat <project_name>I would love to hear your thoughts about this post!
Leave a Reply